
- Using the Print Screen button on Windows 10 or the Snipping Tool on Windows 11, you can take a screenshot.
- You can also use the Game Bar to take screenshots by pressing Windows Key + G.
- In addition, third-party apps provide additional functionality, such as the ability to automatically upload screenshots to the web.
Taking screenshots in Windows 10 or Windows 11 is very easy.
If you know how to take screenshots then it is a very good skill because it has been very helpful for some time. Whether you need to capture an error message, share a funny moment online, or create a tutorial, screenshots come in handy all the time.
In the world of Windows, if you want to take a screenshot on a Windows 10 or Windows 11 computer then this Techkick guide will help you with all the knowledge you need to capture the screenshot like a pro!
There are two main ways to take a screenshot of your entire desktop or specific desktop screen, including all open windows and applications.
Method 1: Using the PrtSc Key (Print Screen button)
If you want to take a screenshot in Windows 10 or 11 then You can use the (PrtScN) Print Screen Button on your keyboard. It is a very handy and easy way to take a screenshot on Windows.
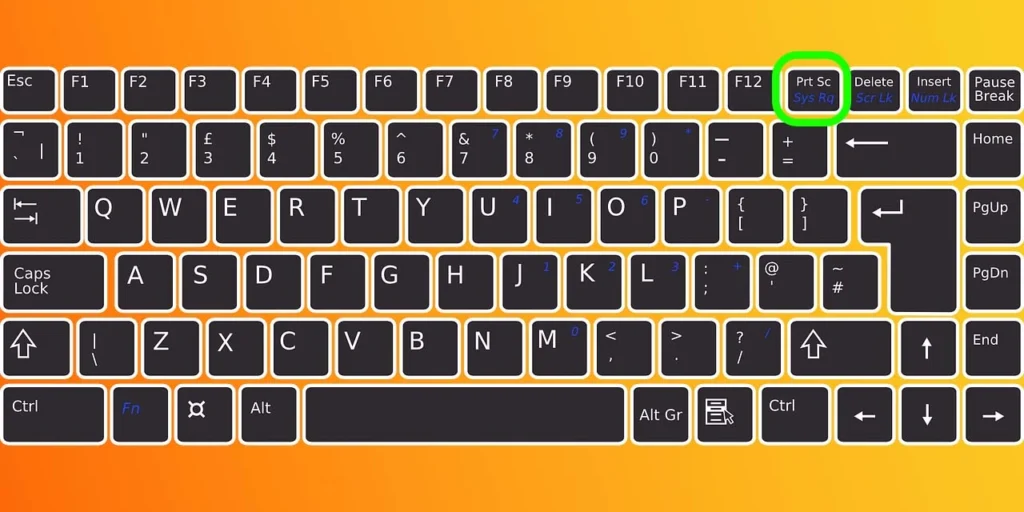
PrtSc is situated just near the Function Key (F1- F12) at the top of the keyboard.
Just click on PrtSc and capture the Whole Screen in Windows 11 And Windows 10, you don’t see anything. But the screenshot has been captured.
It is in your Screenshot Folder on your File Manager. Just check it.

And if it is not available saved( Windows 10 ), Then tension is not. The screenshot is on your clipboard. To save the screenshot, you can paste the screenshot into many programs that allow you to insert pictures like Photoshop, Microsoft Paint Word, etc.

Just paste it By Clicking the Windows Key + V button or Go to Edit and then click on Paste.
- Locate the PrtSc key on your keyboard. It’s usually labeled as “Print Screen” or “PrtScn” and might be situated near the function keys (F1-F12) at the top.
- Press the PrtSc key once. You won’t see anything happen on the screen but don’t worry, the screenshot has been captured! in windows 10
- Now, you need to paste the screenshot into an image editing program. Popular options include Paint, which comes pre-installed on Windows, or more advanced software like Photoshop.
- Open your chosen image editor. In Paint, for example, click on Edit in the menu bar and then select Paste.
- Your screenshot will appear in the editing window. You can now save it as a .jpg, .png, or any other desired image format.
Method 2: Using the Windows Key + PrtSc Shortcut
The Second method is to take a screenshot by just clicking on Windows Key + PrtSc. This method automatically captures and saves the screenshot in the Screenshot folder in File Explorer.
When you click on the Windows Key + PrtSc key your screen will go dim then your screenshot of the entire screen will be saved to the screenshot folder.
This method offers you to quicker and more convenient way to capture the screenshot and save it.
- Press the Windows key and the PrtSc key simultaneously. You’ll see the screen dim for a brief moment, indicating the capture.
- The screenshot will be automatically saved in a folder called Screenshots within your Pictures library.
Note: If you’re using a laptop and the Alt + PrtSc shortcut isn’t working, it might be because the Fn key is overriding the standard key functions. Try pressing Fn + Alt + PrtSc together.
Related Posts:
Top 5 Ways to Fix a Slow Computer & Make Your Computer Fast – TechKick
6 Ways to Fix Low Storage Problem on Windows 11/10/8/7 [2024 New] – TechKick
Introducing Snipping Tool: Your All-in-One Screenshot Tool
The next method to take a screenshot in Windows 10 or 11 is the Snipping Tool. It is a great way to take a screenshot. Whether you want to take a Screenshot of a specific part of Your screen or full screen.
Windows comes with a built-in screenshot tool called Snipping Tool. It offers more control and flexibility than the simple PrtSc methods.
Snipping Tool In Windows 10
The Windows 10 Snipping tool is a great option for capturing screenshots on Windows when you want to customize, mark up, or share your screenshots. It offers the most effective method for marking up your screenshots before they are shared,
It also provides editing features such as an eraser, a ruler, and tools for resizing.
To open the Sniping tool just click on Windows Key + Shift + S. This is the shortcut to the Snipping tool. When you click on these keys, your scene will go dim, and a small menu will open at the top of your screen.
The snipping tool gives you the screenshot option and screen recording option. Just click on the screenshot button and drag in the screen to capture with the mouse by clicking on the left button of your mouse. It also allows you to take a rectangular, free-form, window, or full-screen screenshot.
Once you take the screenshot, it will be stored on your clipboard and a notification for preview will pop up in the lower-right area of your display.
Press the preview notification to launch the Snip & Sketch tool, where you have the option to save, share, or modify the screenshot using the provided drawing tools.
Snipping Tool In Windows 11
In Windows 11, the Snipping Tool has been significantly improved and is now considered the top choice for capturing custom screenshots.
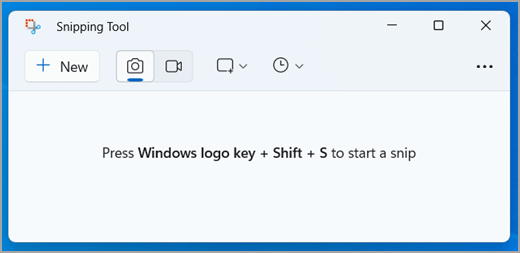
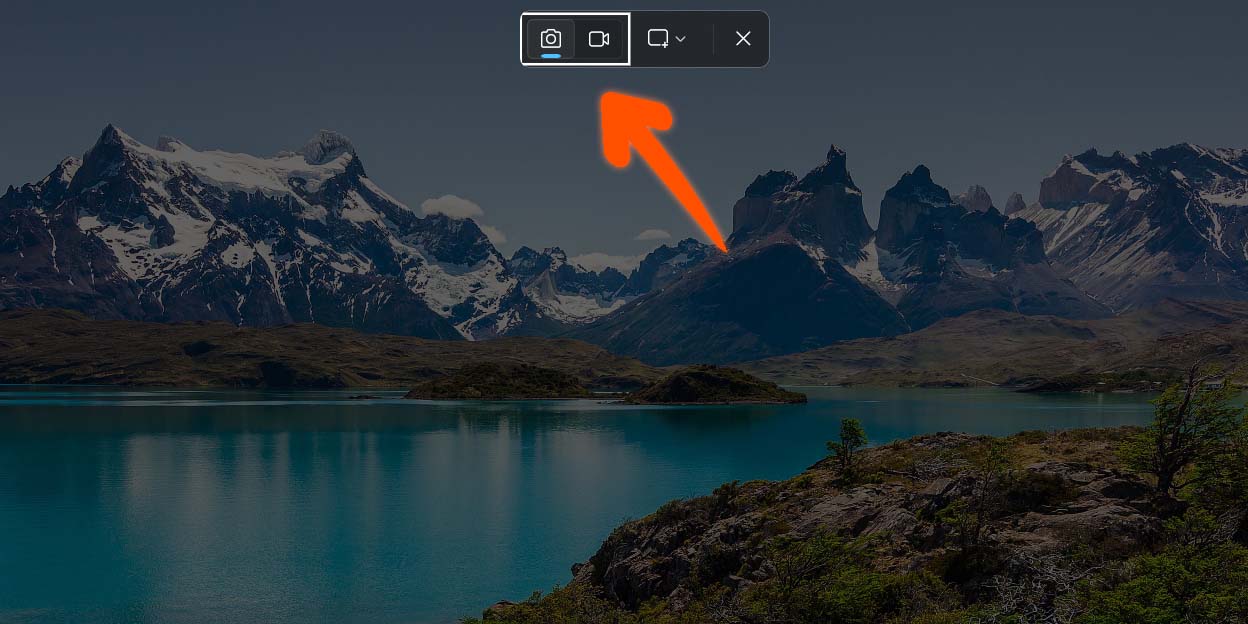
To open the Snipping Tool in Windows 11, you can either search for it or use the shortcut Windows Key + Shift + S. It is Similar to Snip & Sketch, your screen will go dim, and a toolbar displaying various screenshot options will appear at the top.
This toolbar allows you to capture a rectangular, freeform, full-window, or full-screen screenshot and also allows you to set a timer for the duration of time you want the screenshot to be taken.
- To launch the Snipping Tool, search for it in the Windows Start menu bar.
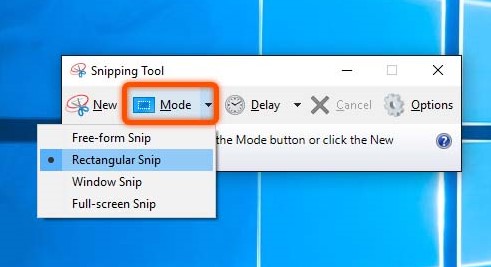
- Snipping Tool provides four capture modes:
- Rectangular Snip: This is the default mode, allowing you to capture a rectangular area of your screen by dragging your mouse.
- Freehand Snip: Draw a freehand shape around the area you want to capture.
- Window Snip: Click on the window you want to capture, and the Snipping Tool will automatically capture its borders.
- Full-screen Snip: This captures your entire screen, similar to the PrtSc key.
- Once you’ve chosen your capture mode, click and drag your mouse to select the desired area. In Snipping Tool, you’ll see a live preview of the selection.
- After capturing the screenshot, you can use the editing tools in Snipping Tool to add annotations, crop the image, or highlight specific parts.
- Finally, click on the Save button and choose a filename and location to save your screenshot.
Beyond the Basics: Advanced Screenshot Techniques
Windows 10 and 11 offer a few additional features for taking screenshots:
- Snip & Sketch: This app is the successor to Snipping Tool and offers similar functionalities with a more modern interface. You can access it by searching for “Snip & Sketch” in the Start menu.
- Windows Key + Shift + S: This shortcut triggers a snipping experience similar to Snipping Tool but without launching the entire app. You can choose your capture mode from a pop-up menu and then capture the desired area.
Third-party Screenshot Tools:
Here are some popular third-party free screenshot tools to consider:
- Greenshot (Windows): This free and open-source tool is great for basic to moderate screenshot needs. It offers capture modes for specific areas, windows, or scrolling web pages, along with annotation options and basic editing features.
- ShareX (Windows): Another free and open-source option, ShareX excels in customization. You can configure keyboard shortcuts, capture workflows, and even automate tasks. It also boasts screen recording functionality and various upload options.
- Lightshot (Windows & Mac): This lightweight tool focuses on capturing specific screen areas and uploading them quickly to the cloud for easy sharing. It also includes a basic image editor for quick adjustments.
- Nimbus Capture (Windows & Mac): Offering both free and paid plans, Nimbus Capture provides a user-friendly interface with features like screen recording, annotation tools, and cloud storage with team collaboration options.
Annotating and Editing Your Screenshots
Regardless of the capture method you use, you can always edit and annotate your screenshots before saving them. Here are your options:
- Built-in Paint Program: As mentioned earlier, Paint allows basic editing functions like cropping, resizing, and adding text boxes or shapes.
- Snipping Tool and Snip & Sketch: Both these tools offer basic annotation options like a pen tool, highlighter, and eraser.
- Advanced Image Editing Software: If you require more extensive editing capabilities, consider using software like Photoshop or GIMP. These programs provide a vast array of tools for editing, manipulating, and enhancing your screenshots. Gimp software
Conclusion: How to take Screenshot on Windows
Taking screenshots is a valuable skill for Windows users. By understanding the various methods, tools, and techniques available, you can effortlessly capture any part of your screen and share it with ease. With a little practice, you’ll be a screenshot pro in no time!
One thought on “How to take a Screenshot on Windows 10 or Windows 11 in 2024”