
If you’ve ever used a Windows computer, chances are you’ve encountered the dreaded Blue Screen of Death (BSOD).
It’s that moment when everything freezes, and your screen turns into an ocean of blue with cryptic white text, leaving you feeling lost and frustrated.
But fear not, because, in this Techkick blog post, we’re going to unravel the mystery behind the Blue Screen of Death and explore the simple reasons why it occurs and then we find the solution for fixing the BSOD.
Firstly, let’s break down what the Blue Screen of Death is.
What is BSOD?
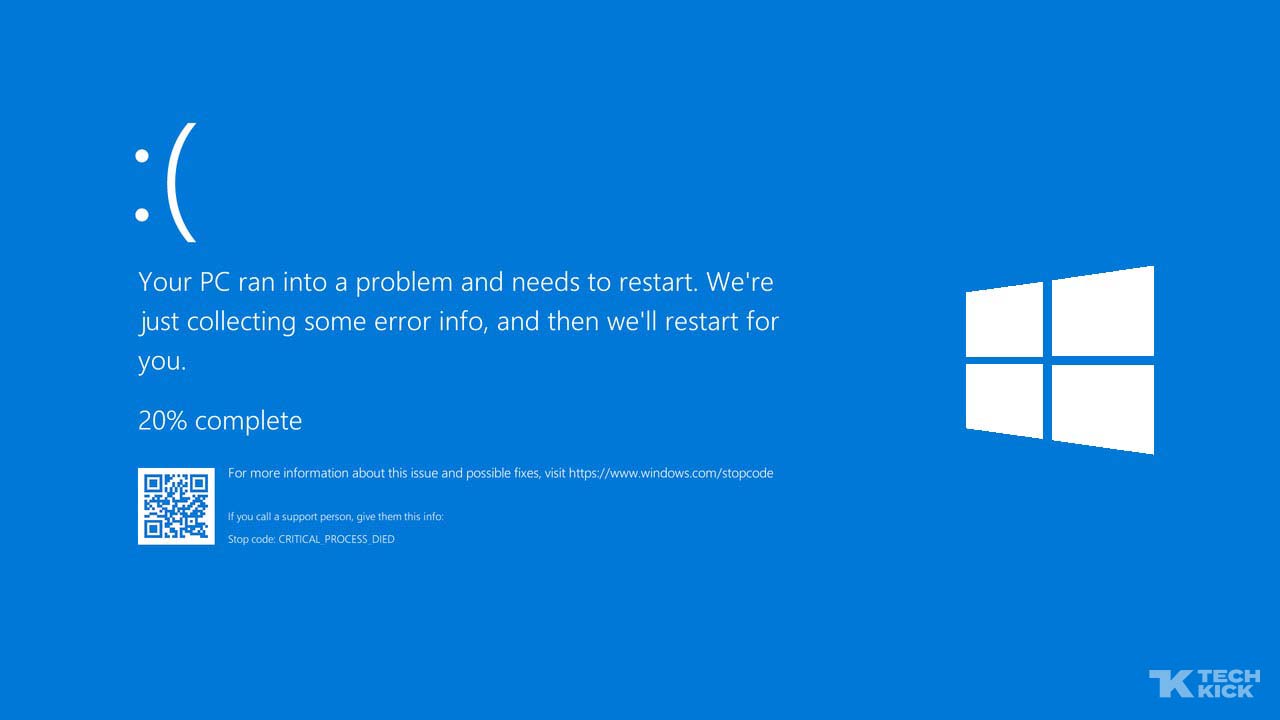
A blue screen of death (BSOD) is a scary Windows error message that means your computer has crashed.
BSODs can be caused by problems with software (drivers) that help your computer parts talk to each other, or by problems with the hardware itself, like a bad memory chip. Unlike an app crash, which only affects the app you were using, a BSOD is a major problem that can lead to data loss if you haven’t saved your work.
In the past, BSODs would display a lot of technical jargon that was confusing to most users. Newer BSODs are designed to be more user-friendly.
They show less technical information and may even include a frowny face to indicate that something is wrong. Some BSODs even have a QR code, which is a little square barcode that you can scan with your phone’s camera.
This code will take you to a website that explains the error in more detail and helps you troubleshoot the problem.
When a BSOD happens, your computer shuts down to protect itself from damage. The computer might be able to fix the problem automatically when it restarts, just like resetting a circuit breaker can sometimes fix a power outage.
However, if the BSOD keeps happening, it’s a sign that there’s a more serious problem that needs to be addressed. You may need to troubleshoot the issue yourself, consult a technician, or even replace faulty hardware.
Essentially, it’s a safety mechanism built into the Windows operating system to prevent further damage when something goes wrong. Think of it as a red flag waving to alert you that there’s a problem that needs to be addressed.
The Reasons for Blue Screen Of Death:
- Hardware Issue
- Driver Problems
- Software Conflicts
- Operating System Errors
- Malware And Viruses.
Let’s Understand the reasons for BSOD in brief :
Hardware Issues
One of the primary reasons behind the Blue Screen of Death is hardware malfunctions. This could include faulty RAM (Random Access Memory), a failing hard drive, or overheating components. When hardware isn’t functioning properly, it can trigger a chain reaction that leads to system crashes.
Blue screens of death (BSOD) can happen because of arguments between your computer parts (hardware). Imagine two people trying to use the same tool at the same time – that’s kind of what a hardware conflict is like.
Here’s how hardware conflicts can lead to BSODs:
- Faulty hardware: Damaged parts like RAM, hard drives, or even your graphics card can cause errors when they try to communicate with other parts.
- Incompatible hardware: Sometimes, new hardware might not be friends with your existing components. This can lead to confusion and crashes.
- Overheating: If your computer gets too hot, its parts can malfunction and cause BSODs. Dust buildup can also trap heat, so keeping your computer clean is important.
These conflicts mess up how your computer talks to itself, which can lead to crashes and the dreaded BSOD.
Driver Problems
Drivers are software components that allow hardware devices to communicate with the operating system. If a driver becomes outdated, incompatible, or corrupted, it can result in system instability and, you guessed it, the Blue Screen of Death. This commonly happens after installing new hardware or software updates.
Software Conflicts
Sometimes, different software programs installed on your computer don’t play nice with each other. This can lead to conflicts that destabilize the system and cause it to crash. It’s like trying to fit two puzzle pieces together that just don’t belong.
Operating System Errors
Even the most meticulously designed operating systems aren’t immune to errors. Bugs, glitches, and corrupted system files can all contribute to the dreaded Blue Screen of Death rearing its ugly head.
Malware and Viruses:
The digital world is full of malicious software just waiting to wreak havoc on unsuspecting users. If your computer becomes infected with malware or a virus, it can cause all sorts of issues, including frequent crashes and the infamous Blue Screen of Death.
Now that we’ve identified some common causes of the Blue Screen of Death, you might be wondering what you can do to prevent it from happening.
When faced with a BSOD, don’t panic! Here are some steps to help you troubleshoot and potentially resolve the issue:
Here are some things you can try to fix BSOD:
- Analyze the Error Code
- Safe Mode
- Update Drivers
- Check for System File Corruption
- Scan for Malware
- Review Recent Changes
- Memory Diagnostics
- Disk Check
- Overheating Issues
- System Restore
- Reinstall Windows
Let’s understand these terms in brief.
1. Analyze the Error Code
Research the error code displayed on the blue screen. Numerous online resources and Microsoft’s support website can provide valuable insights into the potential cause.
The dreaded Blue Screen of Death (BSOD) can be a confusing and frustrating experience.
But fear not, for the cryptic error codes it displays hold valuable clues! Let’s delve into some of the most frequent BSOD culprits and how to understand their messages:
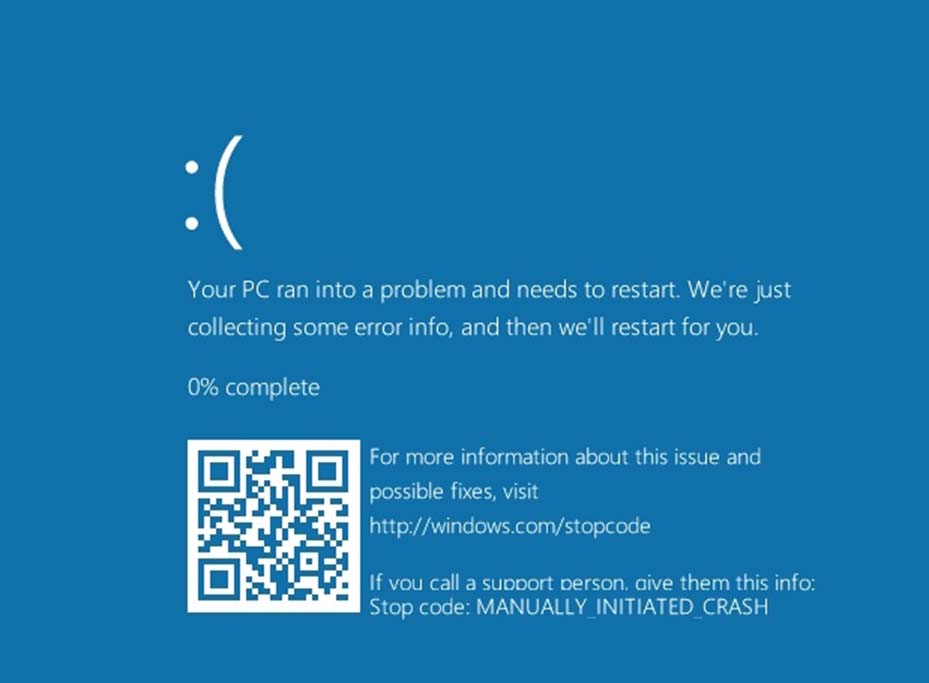
- CRITICAL_PROCESS_DIED: This code indicates a vital system function has stopped working. Did you accidentally end essential processes in Task Manager? Refrain from doing that in the future!
- SYSTEM_THREAD_EXCEPTION_NOT_HANDLED: Outdated or faulty drivers are often the root cause here. Update your drivers or roll back to a previous stable version to prevent this BSOD.
- IRQL_NOT_LESS_OR_EQUAL: This error signifies that device software or a system process attempted to access more memory than allocated. Try scanning for corrupted system files or fixing your drivers to address this issue.
- VIDEO_TDR_TIMEOUT_DETECTED: Are you pushing your graphics card to its limits? This code suggests a GPU processing error. It could also be a sign of malfunctioning graphics drivers.
- PAGE_FAULT_IN_NONPAGED_AREA: A system process tried to access a nonexistent memory address. This could be due to a faulty driver, system process, or even damaged RAM.
- SYSTEM_SERVICE_EXCEPTION: This error often pinpoints the specific driver or system process causing the crash. If a system file is flagged, exercise caution when troubleshooting. Updating or rolling back drivers is generally safer than meddling with system fixes.
- DPC_WATCHDOG_VIOLATION: Outdated or incompatible device drivers can trigger this error. Additionally, some system files might be corrupted.
- NTFS_FILE_SYSTEM: This code points to hard drive corruption, a common consequence of wear and tear. Running a disk scan can identify and potentially repair damaged sectors.
- DATA_BUS_ERROR: This is a generic code for hardware-related issues. The hardware component might be malfunctioning, incompatible, or incorrectly configured. Removing the component might be necessary if other solutions fail.
Remember, you don’t need to memorize how to fix each specific code. Our comprehensive guide will equip you with the knowledge to tackle BSOD-related problems effectively!
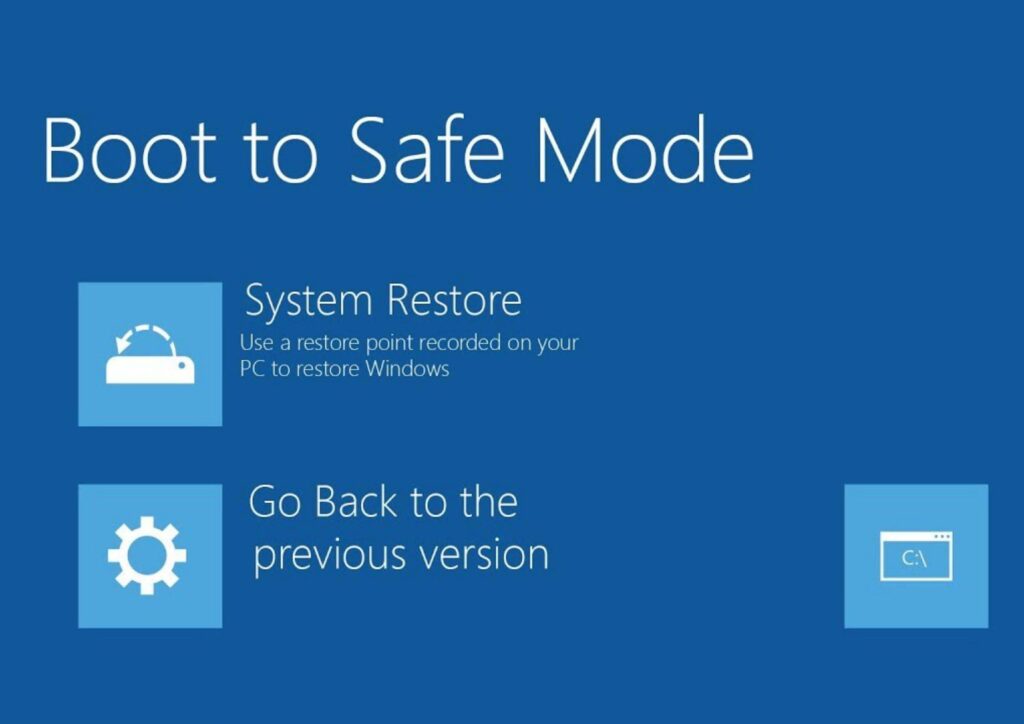
2. Safe Mode
If your PC restarts automatically after a BSOD, try booting into Safe Mode. This mode loads a minimal set of drivers and programs, allowing you to diagnose and troubleshoot issues without the interference of non-essential software.
There are two primary ways to access Safe Mode in Windows, depending on whether your system is currently functioning normally or stuck in a loop that prevents a normal startup:
Method 1: Accessing Safe Mode from a Running Windows System
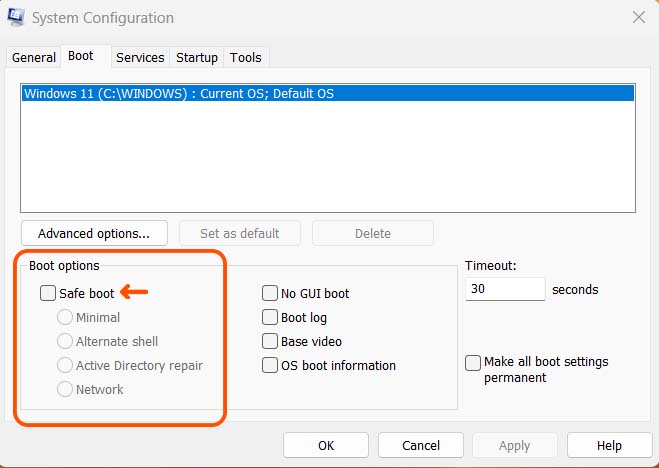
- Press the Windows key + R on your keyboard to open the Run dialog box.
- Type
msconfigin the text field and press Enter or click “OK.” This will launch the System Configuration window. - Navigate to the “Boot” tab.
- Under “Boot options,” check the box next to “Safe Boot.” You’ll see several additional options here:
- Minimal: Starts Windows with a basic set of drivers and services.
- Network: Starts Windows in Safe Mode with networking enabled, allowing you to access the internet and local network resources.
- Command Prompt: Starts Windows in Safe Mode with a command prompt instead of the graphical user interface (useful for advanced troubleshooting).
- Choose the desired Safe Mode option. Minimal is a good starting point, while Network or Command Prompt might be needed for specific troubleshooting tasks.
- Click “Apply” and then “OK.” You’ll be prompted to restart your computer.
- Click “Restart” to boot into Safe Mode.
Method 2: Accessing Safe Mode from the Windows Sign-in Screen
This method is useful if your Windows system is unable to boot normally or gets stuck in a loop.
- On the Windows sign-in screen, hold down the Shift key while clicking on the Power button in the bottom-right corner.
- Click on “Restart.”
- After the computer restarts, you’ll see a “Choose an option” screen. Select “Troubleshoot.”
- On the “Troubleshoot” screen, click on “Advanced options.”
- On the “Advanced options” screen, click on “Startup Settings.”
- Click on “Restart” to reboot your computer with startup settings options.
- Once your computer restarts, you’ll see a list of startup options. You can use the F keys on your keyboard to select the desired Safe Mode option:
- F4: Enable Safe Mode
- F5: Enable Safe Mode with Networking
- F6: Enable Safe Mode with Command Prompt
Exiting Safe Mode
Once you’ve finished troubleshooting in Safe Mode, you can exit it and restart your computer normally. Simply restart your PC as usual, and the Safe Mode settings will be disabled.
3. Update Drivers
One of the leading causes of the Blue Screen of Death (BSOD) is outdated drivers.
Just like any software, device drivers require regular updates to function optimally and maintain compatibility with your system. Here’s why keeping your drivers updated is crucial and how to do it effectively.
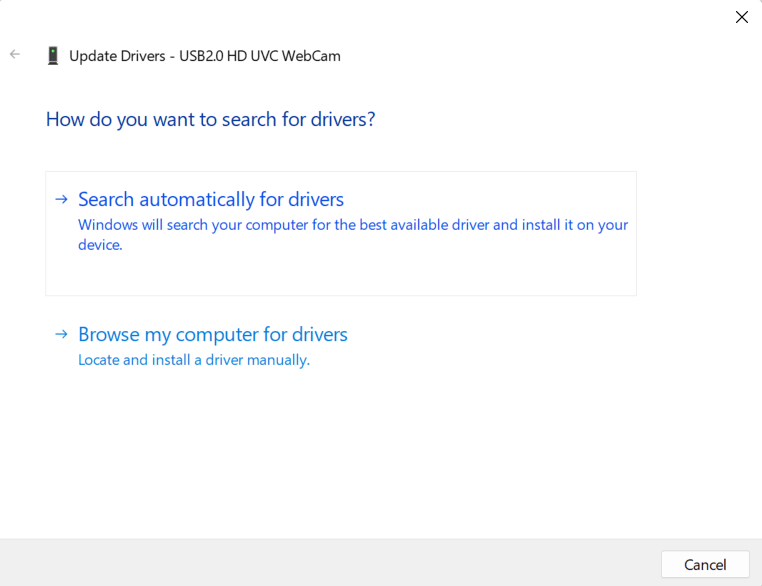
For Updating Drivers, Go to the Search bar of Windows, and Search Device Manager.

Open Device Manager and select Drivers one by one Right click on Drivers, And click on Update Drivers.
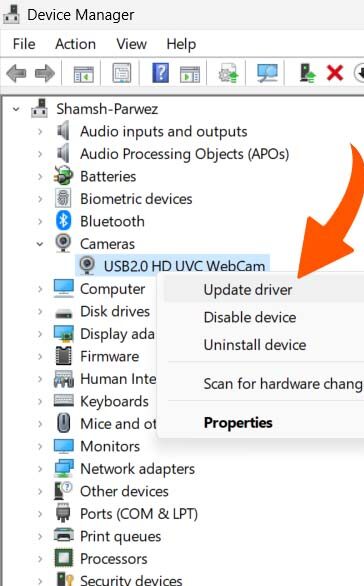
Then You get two options Search Automatically for Drivers and Browse My Computer for drivers. Select as you wish. The most significant option is to Search Automatically for Drivers
4. Check for System File Corruption
Tools like System File Checker (SFC) and DISM can scan for and repair corrupted system files that might be causing instability.
5. Scan for Malware
Run a thorough malware scan using a reputable antivirus or anti-malware program. Malicious software can wreak havoc on your system and lead to BSODs.
So, you can also install Antivirus Software.
6. Review Recent Changes
If the BSOD started happening after a recent change, consider uninstalling any newly installed software or hardware. This might help isolate the issue.
7. Memory Diagnostics
Run a memory diagnostic tool to check for faulty RAM. Windows has a built-in memory diagnostic tool, or you can utilize third-party memory testing software.
8. Disk Check
Run a disk-checking utility like CHKDSK to identify and fix potential errors on your hard drive.
The Blue Screen of Death (BSOD) can be a real headache, but sometimes the culprit lies within your hard drive. Here’s where CHKDSK, a built-in Windows utility, comes in handy.
It can scan your hard drive for errors and even attempt to fix them, potentially preventing BSODs and ensuring smooth system operation. Let’s delve into how to use CHKDSK effectively:
What is CHKDSK?
CHKDSK (pronounced “check disk”) is a command-line utility available in Windows that performs two primary functions:
- Scans your hard drive for errors: CHKDSK can identify various errors on your hard drive, such as corrupted file systems, bad sectors, and lost clusters.
- Attempts to fix the errors it finds: Depending on the type of error encountered, CHKDSK can attempt to repair it, restoring the integrity of your hard drive.
When to Use CHKDSK?
Here are some situations where running CHKDSK might be beneficial:
- Experiencing BSODs: BSODs can sometimes be caused by hard drive errors. CHKDSK can help identify and fix these errors, potentially preventing future crashes.
- Slow System Performance: Hard drive errors can contribute to sluggish system performance. CHKDSK can detect and potentially resolve these issues, improving overall system responsiveness.
- Suspected Hard Drive Issues: If you suspect your hard drive might be malfunctioning (e.g., unusual noises, frequent file system errors), CHKDSK can provide valuable insights into potential problems.
Using CHKDSK: Two Methods
There are two primary ways to run CHKDSK:
Method 1: Command Prompt
- Open Command Prompt as Administrator: Press the Windows key, type “cmd,” right-click on “Command Prompt,” and select “Run as administrator.”
- Navigate to the Drive: In the Command Prompt window, type
chkdsk [drive letter]:(e.g.,chkdsk C:for the C drive) and press Enter. - Optional: Scan for Errors and Fix Them: If you want CHKDSK to attempt to fix errors it finds, add the
/fparameter to the command (e.g.,chkdsk C: /f). This will prompt you to dismount the drive before the scan, usually requiring a system restart.
Method 2: Graphical User Interface (GUI)
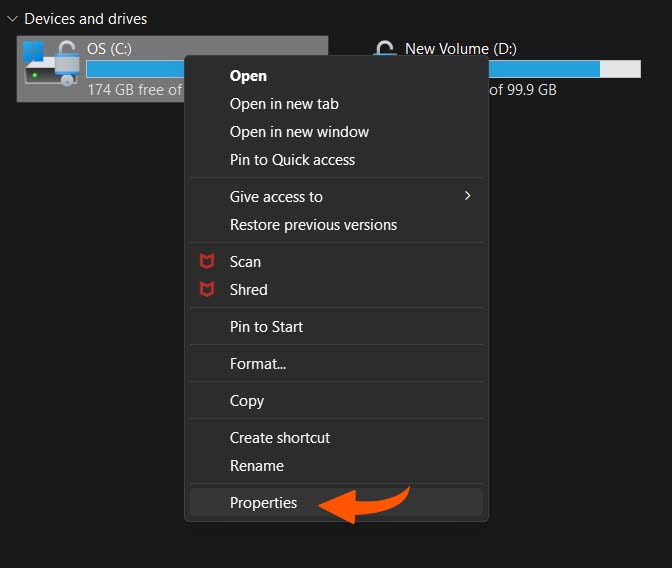
1. Open File Explorer: Open File Explorer and navigate to “This PC.”
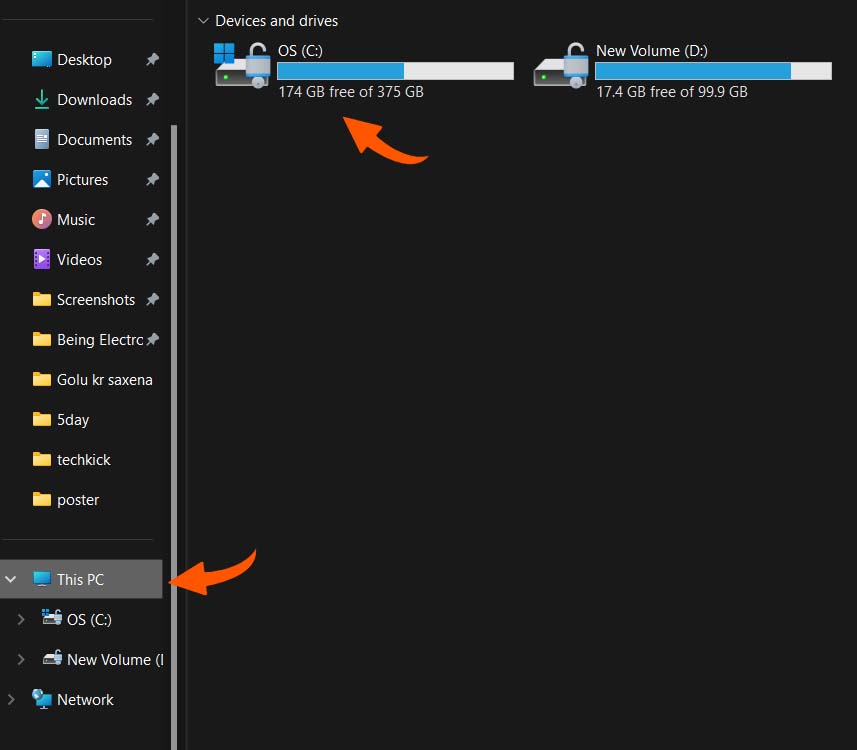
2. Right-click on the Drive: Right-click on the drive you want to scan (e.g., C drive) and select “Properties.”
3. Tools Tab: Click on the “Tools” tab.
4. Error Checking: Under “Error checking,” click on “Check.”
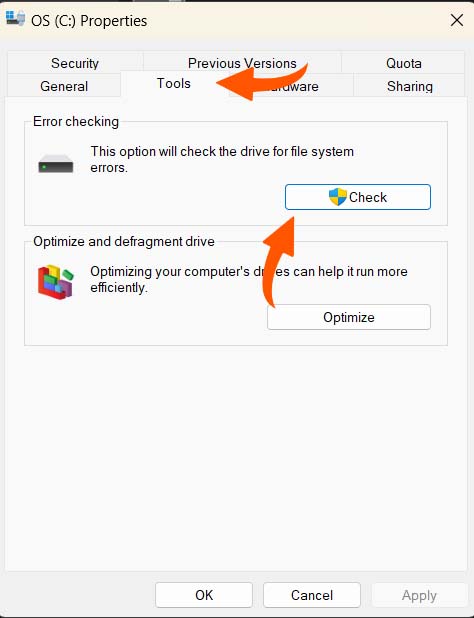
5. Scan for Errors and Fix Them: You can choose “Scan drive” for errors or “Scan drive and fix errors” (similar to adding the /f parameter in the command prompt method).
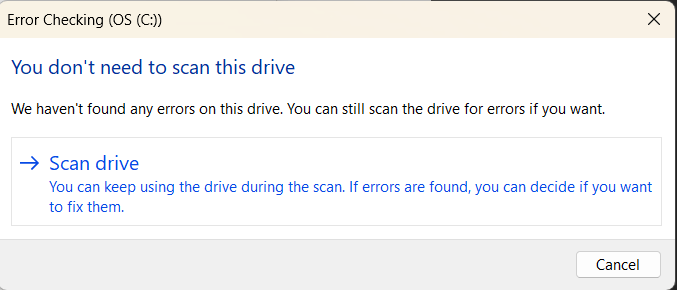
Important Note: If you choose to fix errors, CHKDSK might need to scan the drive while it’s in use. In this case, you’ll be prompted to schedule the scan for the next time you restart your computer.
After the Scan
Once the scan is complete, CHKDSK will display a report summarizing the errors it found and any repairs it attempted. Analyze the report to understand the nature of the errors encountered.
If significant errors were found and fixed, consider monitoring your system performance and stability to see if the issues have been resolved.
9. Overheating Issues
Ensure proper ventilation for your computer. Clean dust build-up from vents and fans. Consider replacing the thermal paste on your CPU or graphics card if your system runs excessively hot.
10. System Restore
If the BSOD is a recent development, consider performing a System Restore to a point before the issue starts. This can revert your system settings and drivers to a previous state, potentially resolving the problem.
11. Reinstall Windows
If all else fails, consider reinstalling Windows as a last resort. This will erase all your data and programs, so be sure to back up important files before proceeding. Reinstalling Windows can often resolve problems caused by deeply rooted software conflicts or corrupted system files.
Preventing the BSOD: Proactive Measures
While BSODs can be frustrating, several proactive measures can significantly reduce their occurrence:
- Regular Updates: Keep your Windows system, device drivers, and software applications updated with the latest patches. Updates often address security vulnerabilities and fix bugs that can lead to crashes.
- Quality Hardware: Invest in reliable hardware components. Opt for reputable brands and ensure compatibility with your system.
- Proper Ventilation: Maintain good airflow within your computer case. Regularly clean dust build-up from vents and fans to prevent overheating.
- Resource Management: Avoid overloading your system with resource-intensive tasks. Close unnecessary programs and background processes to free up memory and CPU usage.
- Backup Regularly: Regularly back up your important data to an external drive. This ensures you don’t lose valuable information in case of a severe system crash.
By following these preventative measures, you can significantly reduce the chances of encountering the dreaded Blue Screen of Death.
Conclusion: Keeping Your System Stable
The Blue Screen of Death, while a disruptive experience, can be a valuable diagnostic tool.
By understanding the common causes, familiarizing yourself with troubleshooting steps, and implementing preventative measures, you can minimize BSOD occurrences and ensure a more stable and enjoyable PC experience.
Remember, if you encounter a BSOD and feel overwhelmed by the troubleshooting process, consider seeking help from a technical professional. They can assist in diagnosing the issue and implementing appropriate solutions.
This blog has provided a comprehensive overview of the Blue Screen of Death, its causes, troubleshooting techniques, and preventive measures. We hope this information empowers you to keep your system stable and avoid the blues!
I appreciate the step-by-step approach.
😊
Please tell me more about this. May I ask you a question?
Thank you for writing this post!
Thanks for posting. I really enjoyed reading it, especially because it addressed my problem. It helped me a lot and I hope it will help others too.
The other day, while I was at work, my sister stole my iPad and tested to see if it can survive a thirty foot drop, just so she can be a youtube sensation. My iPad is now destroyed and she has 83 views. I know this is completely off topic but I had to share it with someone!
Valuable info. Lucky me I found your website by accident, and I am shocked why this accident didn’t happened earlier! I bookmarked it.
North Natt Only Fans Mega Link Folder
Pretty nice post. I just stumbled upon your blog and wished to say that I have truly enjoyed surfing around your blog posts. In any case I will be subscribing to your feed and I’m hoping you write again soon!
You made some decent points there. I did a search on the issue and found most guys will consent with your website.