
The worst thing that happens when we record videos with Phones or Cameras is that the video is shaky or unstable. Then, the video is no longer useful or if we use then it looks unprofessional or not looking good.
The most painful part comes when we record the best view once and it records shaky. Then it frustrates us and we can’t do it anymore.
When the video is full of shaky then we can’t use it in Instagram or Facebook stories, status or even we can’t edit that video because it makes an unprofessional impression.
But every problem comes with a solution. The solution is to use video stabilizer Apps on Android. Yes, we can stabilize video on Android with stabilizer apps.
People always think that they only stabilize videos on Laptops or PC but it is a myth. We can also stabilize video in Android with no quality loss.
So, let’s start this blog.
Before telling you about the Android stabilizer apps, I want to share some tips on how to control stabilization.
Some Tips to Record Stabilized Video Before Shooting
When you record the video with a mobile or camera. Try to use your hands like a gimble. And move slowly or gently for stabilization.
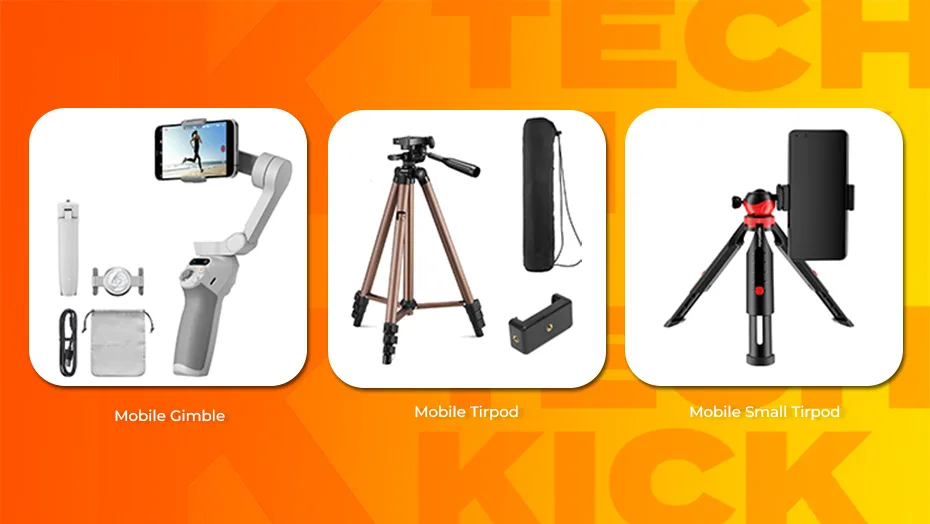
If you have some extra money, then purchase a Mobile gimbal. Gimble is used to record moving videos, but if you want to record in one place, you can use a tripod. There are small tripods that fit in every place.
If you want to buy then I chose the best mobile gimble or tripod for You.
Best Products Link:
Mobile Gimble: Click Here For Purchase
Mobile Tripod: Click Here for Purchase
Small Mobile Tripod: Click Here For Purchase
During Recording, Just move slowly and smoothly. Don’t be impatient. You have to just avoid sudden movements. Maybe, Stabilization can be a time-consuming process, but it’s worth it for smooth, professional-looking footage.
You have to practice recording with your hands. In starting, maybe, your hands vibrate but it will fix with practice. Don’t Be Afraid to Experiment. There is no one-size-fits-all approach to stabilization. Try different techniques and settings to find what works best for you.
If you’re struggling, don’t hesitate to ask for help from friends, family, or online communities.
Stabilize Video on Android With Google Photos
The best video stabilizer app on Android is Google Photos. Yes, it can stabilize video in some seconds without any quality loss.
You already know that Google Photos is installed on every Android phone and it has many more best features for photos and Videos. Of these best features, one feature is a Video Stabilizer with AI. And it doesn’t need any Internet Data for it.
But, what is the process for stabilizing video with Google Photos?
How to Stabilize Video with Google Photos
1. To stabilize your video in Google Photos, open It in your Google Photos (Not by sharing). then Click on Edit from the Bottom side.
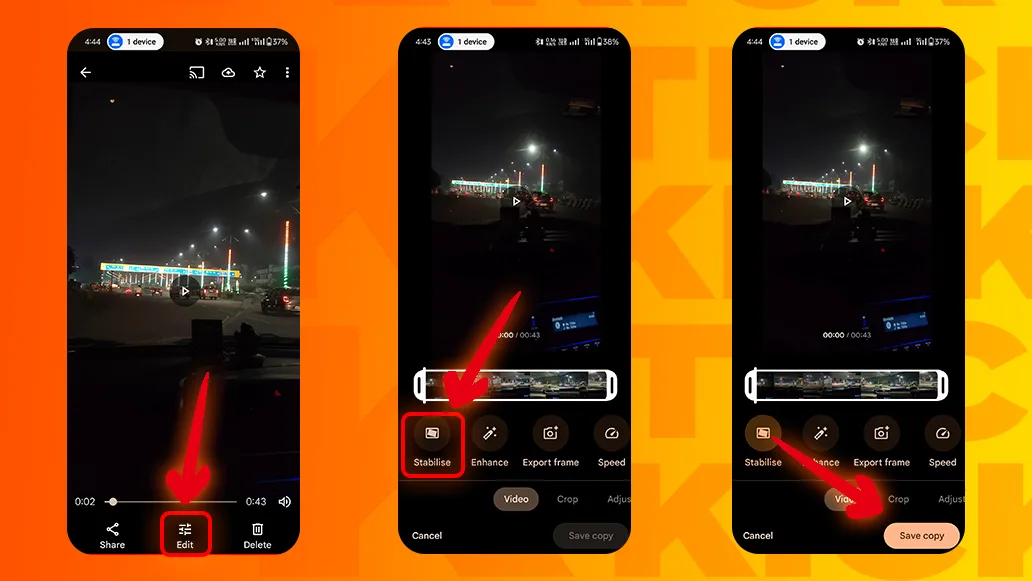
2. In the video section, you will get the Stabilise option. Just click on that. It will take time according to your video duration. After some time processing, your stabilized video is ready.
3. Click on ‘Save Copy” for export.
If the video is slightly shaky, then Google Photos makes it perfectly stabilized.
This way, you can stabilize video on Android without installing any extra apps.
Related Posts: 10 Best Photo Editing Apps For Android 2025 (Dec 2024) – TECHKICK
Stabilize Video on Android With CapCut
The next Android stabilizer app is CapCut. It is the best video editing app for Android. It is very popular for its trendy video effects, transitions, text effects, etc.
Most importantly it has all basic to advanced features for video editing in Android. Of these best features, one of the features is Video stabilization. Here, you can stabilize shaky videos.
It stabilizes video with cropping that usually works like a PC video editor.
You have to use VPN for using CapCut if you use in India.
How to Stabilize Video with CapaCut
1. Just import the shaky video in CapCut. To import, click on New Project and select the video.
2. Select the video from the timeline.
3. Slide the features to the end (Right to Left) and You get the option of Stabilize.
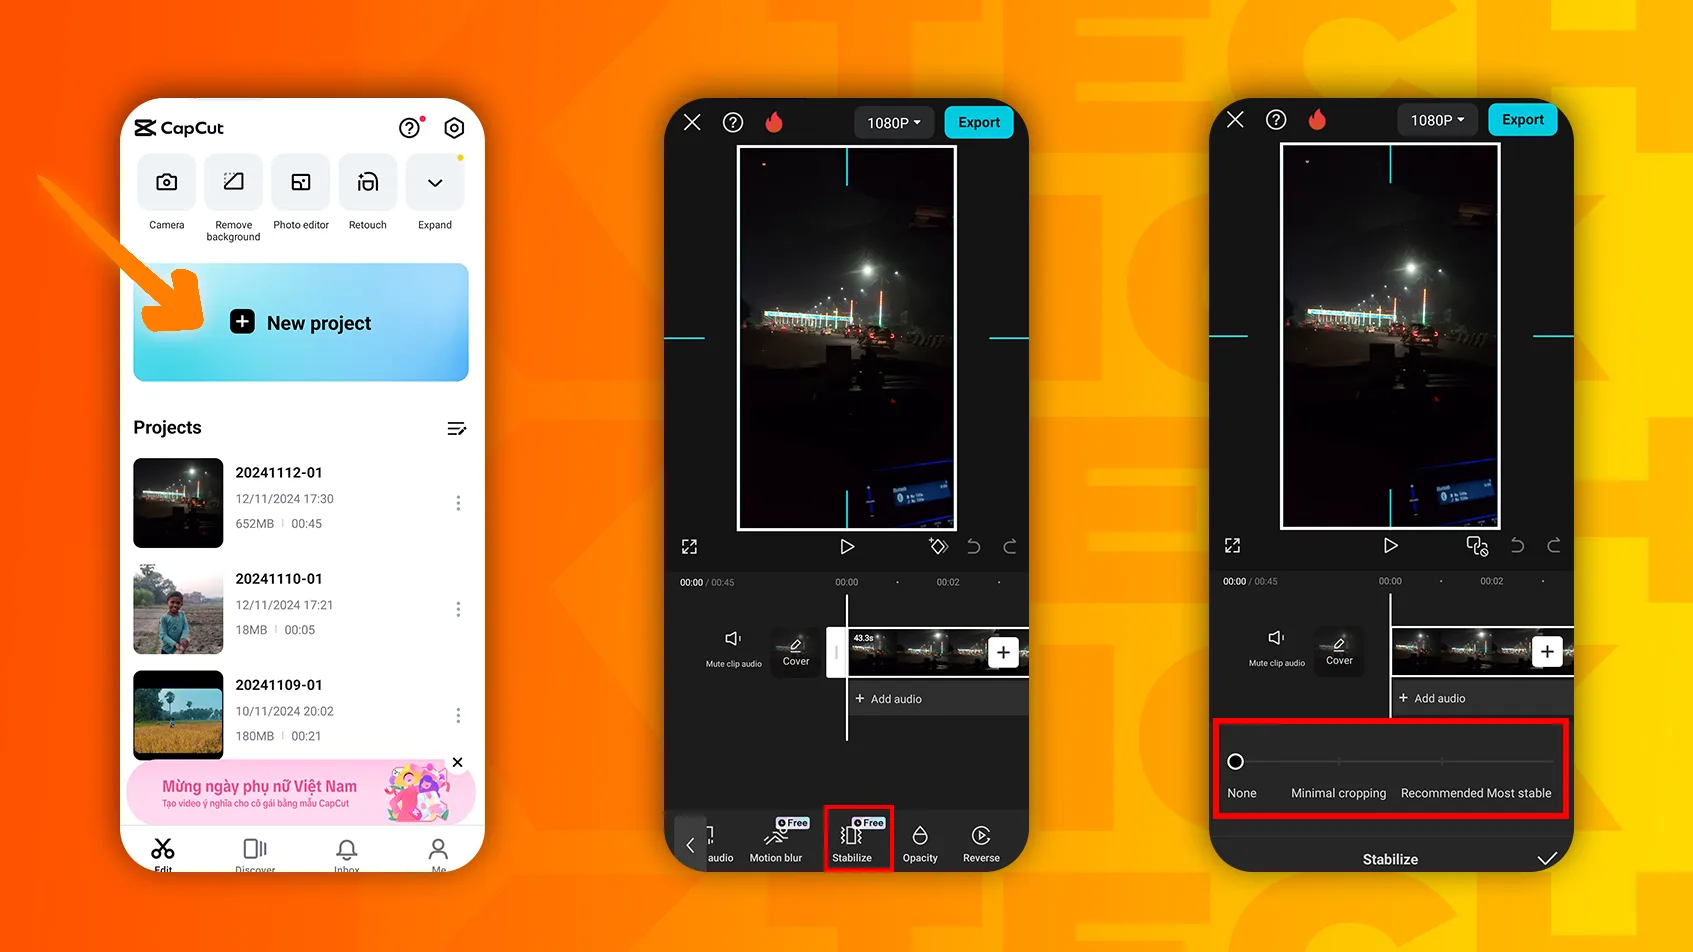
4. Just click on that. You get two options, “Minimal Cropping” and “Recommended Most Stable“.
5. Minimal cropping is recommended for low shaky footage. Most stable is recommended for highly shaky footage.
6. After the stabilization, just import the video in the same format. Ex: If your video is 1080p in 30fps then choose the same format. Through this process, your video footage is stabilized without any quality loss.
Related posts: How to Download WhatsApp Status Videos and Photos (5 Easy & Pro tips) – TECHKICK
Conclusion
There are other online methods or apps also available for stabilization but they are not free or stabilize efficiently.
These are two Android stabilizer apps for Android that stabilize any shaky videos without any cost. Most importantly these stabilizer apps can’t lose any video quality. So, use it and Enjoy.😊