
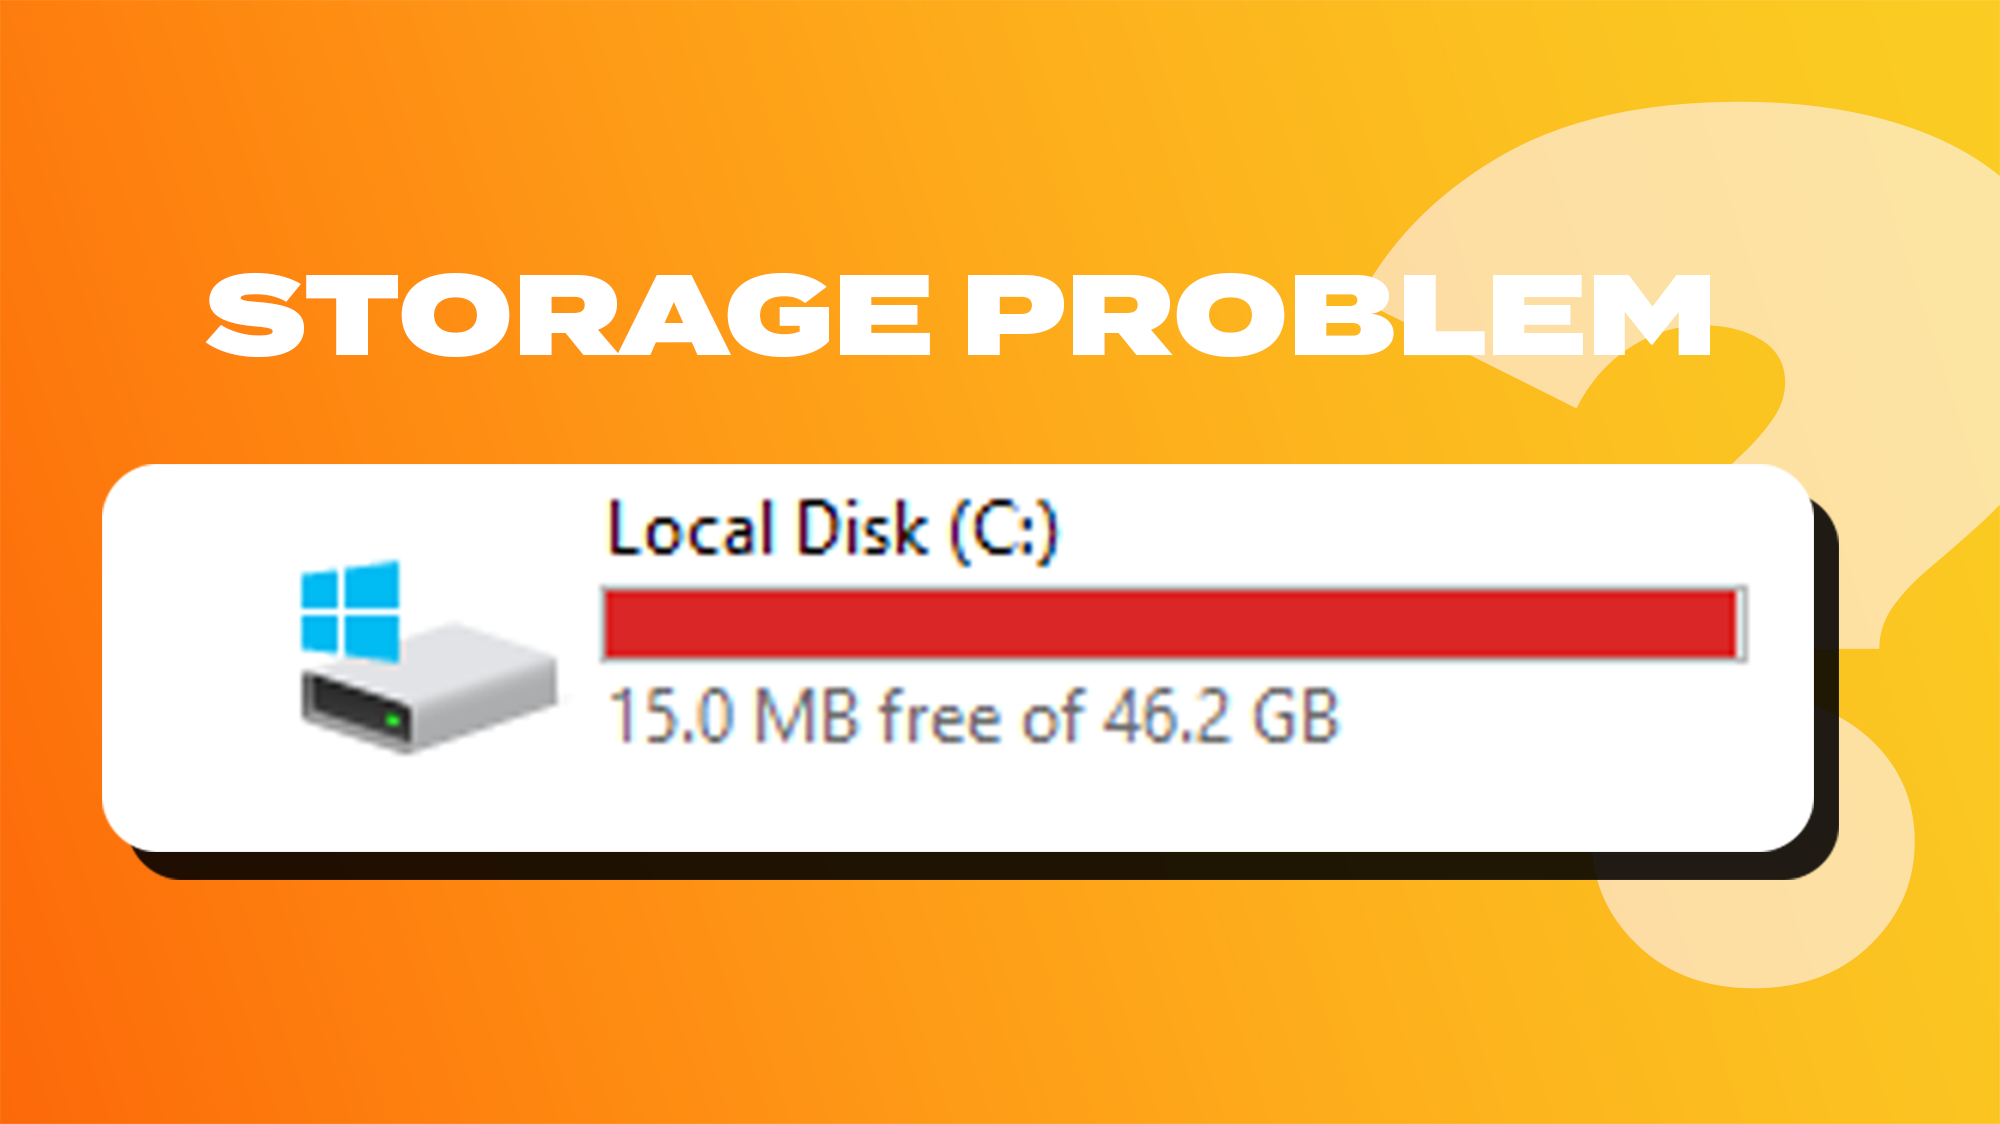
Ever feel like your computer’s getting slower by the day? Or are you facing a problem with low storage on your Windows PC?
Because low storage problems are common to all Windows users.
Files refuse to open, programs take forever to load, and that dreaded “low storage” notification keeps popping up.
And day by day, you get frustrated with your computer. You’re not alone.
Millions of Windows users struggle with a constant battle for free space. but fear not, I will tell you 6 different ways to fix your low Storage problem.
Low Storage Effects on PC
- Hard Drive Scramble
- Limited memory lane
- Overall slowdown
Low storage can significantly reduce your computer’s speed. Here’s why:
Hard Drive Scramble: When your drive is full, the computer has difficulty finding space to store temporary files, updates, and other bits of data to run smoothly.
Limited Memory Lane: The paging file, also called a virtual memory file, is a hidden section of your hard drive that your PC uses like an extension of its RAM. When your RAM gets full, the paging file acts as an overflow lane, temporarily storing inactive or less frequently used RAM data.
This allows your computer to keep running programs smoothly even when RAM is maxed out. With low storage space, the paging file doesn’t have enough room to perform this task effectively.
This can lead to slow performance, programs freezing or crashing unexpectedly, and error messages about being “out of memory” even though you haven’t opened that many programs.
Overall slowdown: A full drive can tax your hard drive itself. On a traditional hard disk drive (HDD), the drive head needs to move physically back and forth across the platters to read and write data.
This seek time increases as the drive fills up because the head has to travel farther to find space.
Additionally, a full HDD can lead to more frequent disk fragmentation, which further reduces performance. Fragmentation occurs when files are saved in chunks in scattered locations around the drive, rather than contiguously.
This means the drive head has to work even harder to read and write data, slowing things down
6 ways to fix low storage on Windows:
- Utilize Storage Sense
- Disk Cleanup
- Uninstall Unnecessary Application
- Install another SSD or Hard drive
- Delete Temporary Files
- Reset Your Computer
1. Utilize Storage Sense
The first one to fix the low disk storage problem is to utilize Storage Sence.
Storage Sense is a built-in Windows hero feature that automatically cleans up unnecessary files and clutter to free up space on your drive. Here are its key features:
- Automatic Cleanup: Once enabled, Storage Sense can automatically identify and remove temporary files, leftover junk data, and other non-essential items regularly.
- Configurability: You have some control over Storage Sense. You can set it to run automatically when low disk space is detected, or you can manually trigger cleanup whenever you feel your drive needs a refresh.
- Customizable Options: Storage Sense offers options to specify which types of files you want it to target for deletion. This allows you to exclude important temporary files used by specific programs.
And I want to say that Every Windows user has to enable the Storage Sence inbuilt Feature in His Windows.
For Enabling Storage Sense Feature:
- Go to Setting.
- Search Storage Sence in the Search Bar
- Turn On Storage Sence.
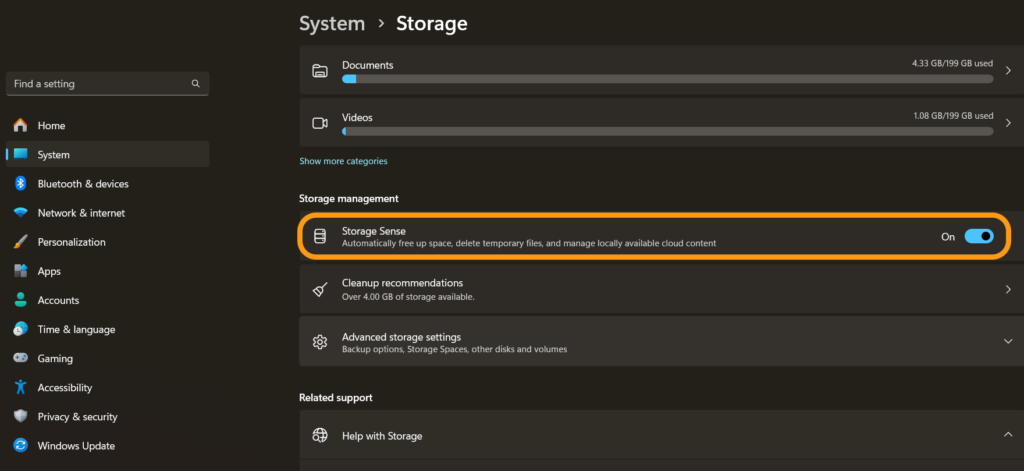
Overall, Storage Sense is a convenient way to keep your Windows PC running smoothly by maintaining healthy storage levels.
2. Disk Cleanup
The Second one is Disk Cleanup.
Disk Cleanup is a built-in tool on Windows computers that helps you free up storage space on your hard drive. It works by finding and deleting unnecessary files that can accumulate over time. These files can include:
- Temporary files: These are files that programs create and use temporarily, but they are no longer needed once the program is finished.
- Internet files: These are files that your web browser downloads to speed up loading times for websites you visit frequently.
- Recycle Bin files: These are files that you have deleted, but they are still taking up space on your hard drive until you empty the Recycle Bin.
- System files: These are temporary system files that Windows creates, but they are no longer needed.
Disk Cleanup is a safe and easy way to free up disk space on your computer. It can help to improve the performance of your computer by making it run faster.
Here are some additional things to know about Disk Cleanup:
- It’s a good idea to run Disk Cleanup regularly, such as once a month.
- You can review the list of files that Disk Cleanup wants to delete before you delete them.
- Disk Cleanup won’t delete any files that you need to run your computer.
How to use Disk Cleanup for Low Storage
- Go to the Search bar and Search Disk Cleanup.
- Select the Drive (D1) which is full and you can also do it one by one.
- Click Ok. And select all. NOTE: If you have files in the download and recycle bin then don’t select it.
- And then Click on Clean up system Files.
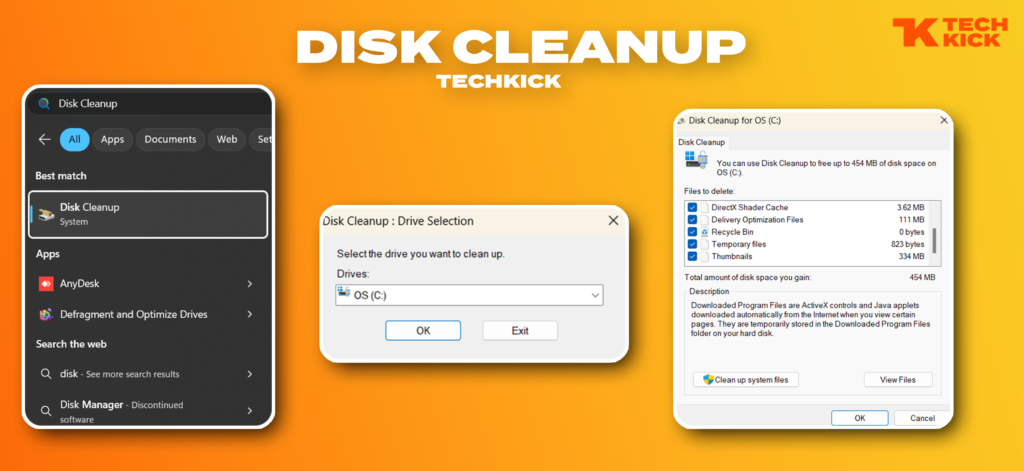
Overall, Disk Cleanup is a user-friendly tool that provides a safe and straightforward way to reclaim storage space on your Windows PC.
3. Uninstall Unnecessary Application
If your Laptop has too many Applications then it accumulates storage which causes storage Problems.
Uninstalling unnecessary applications is a simple yet powerful way to reclaim storage space and breathe new life into your Windows machine.
The Uninstallation Process from Windows:
- Open Setting
- Go to Apps & features
- Select Apps and click on Uninstall.

Some programs may require additional steps for complete removal. These might involve uninstallers provided by the program itself or manual deletion of leftover files and registry entries (proceed with caution if going this route).
4. Install another SSD or Hard drive
And if you want to get free space without any deleting files then you have to install another SSD or Hard Drive.
But If you want to get extra speed then use SSD than Hard drive because SSD is faster than HDD.
Installing another SSD or hard drive is a great way to significantly increase your storage capacity on a Windows PC.
If you’re not comfortable opening your PC case or dealing with hardware installation, consider seeking help from a computer technician.
So, Overall, If you install SSD and hard drives then it will increase the storage of your PC.
Related posts: How to Check RAM slots in Windows (6 Quick And Easy Method) – TECHKICK
5. Delete Temporary Files
Temporary files are a byproduct of many programs you use on your Windows PC. These files can include leftover data from program installations, cached web browsing data, and temporary files created while programs are running.
Over time, these temporary files can accumulate and consume significant storage space on your hard drive.
This can lead to several problems, including reduced system performance, slower program startup times, and even error messages when your drive becomes too full.
So, One method to Delete Temporary files is Disk Cleanup. That I told you in First Point.
The Second Method is:
Delete all Temporary Files.
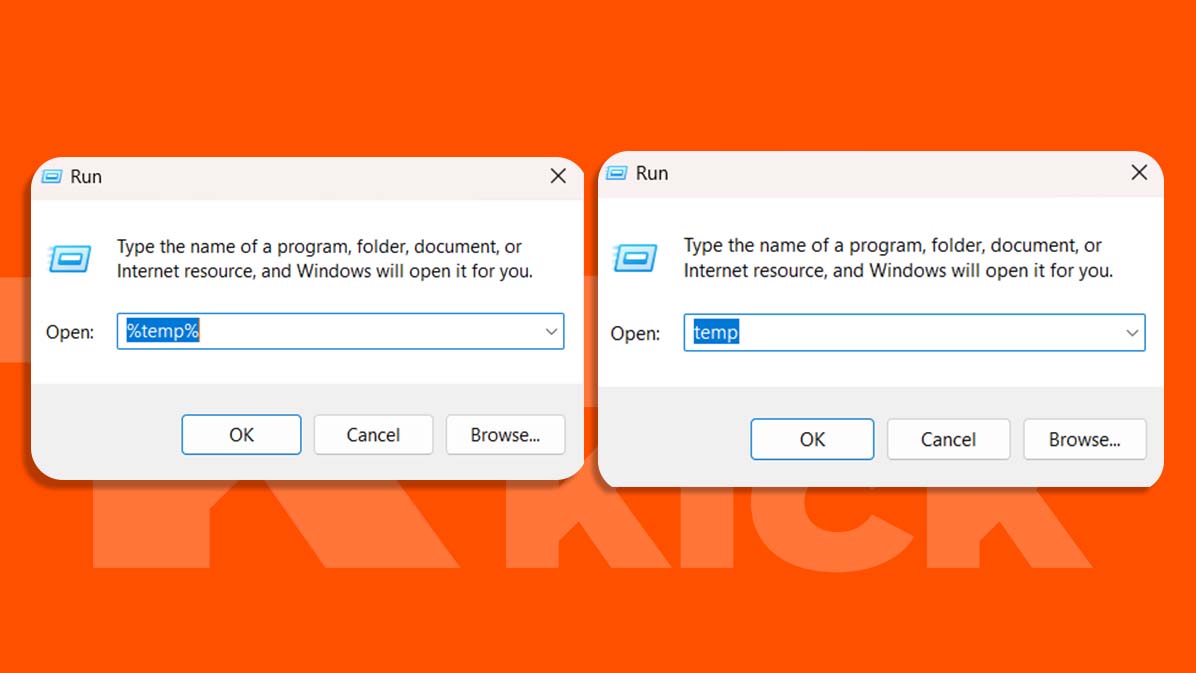
- Search Run on the search bar.
- Open Run and search “temp” on the search bar.
- Click on Continue and Delete All files.
- Again Search %temp% on the search bar.
- And again Delete all the files.

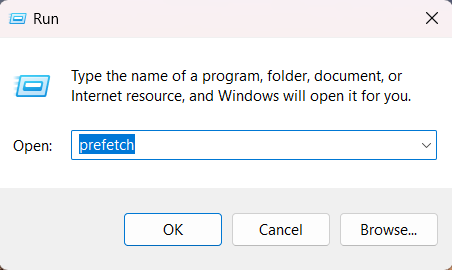
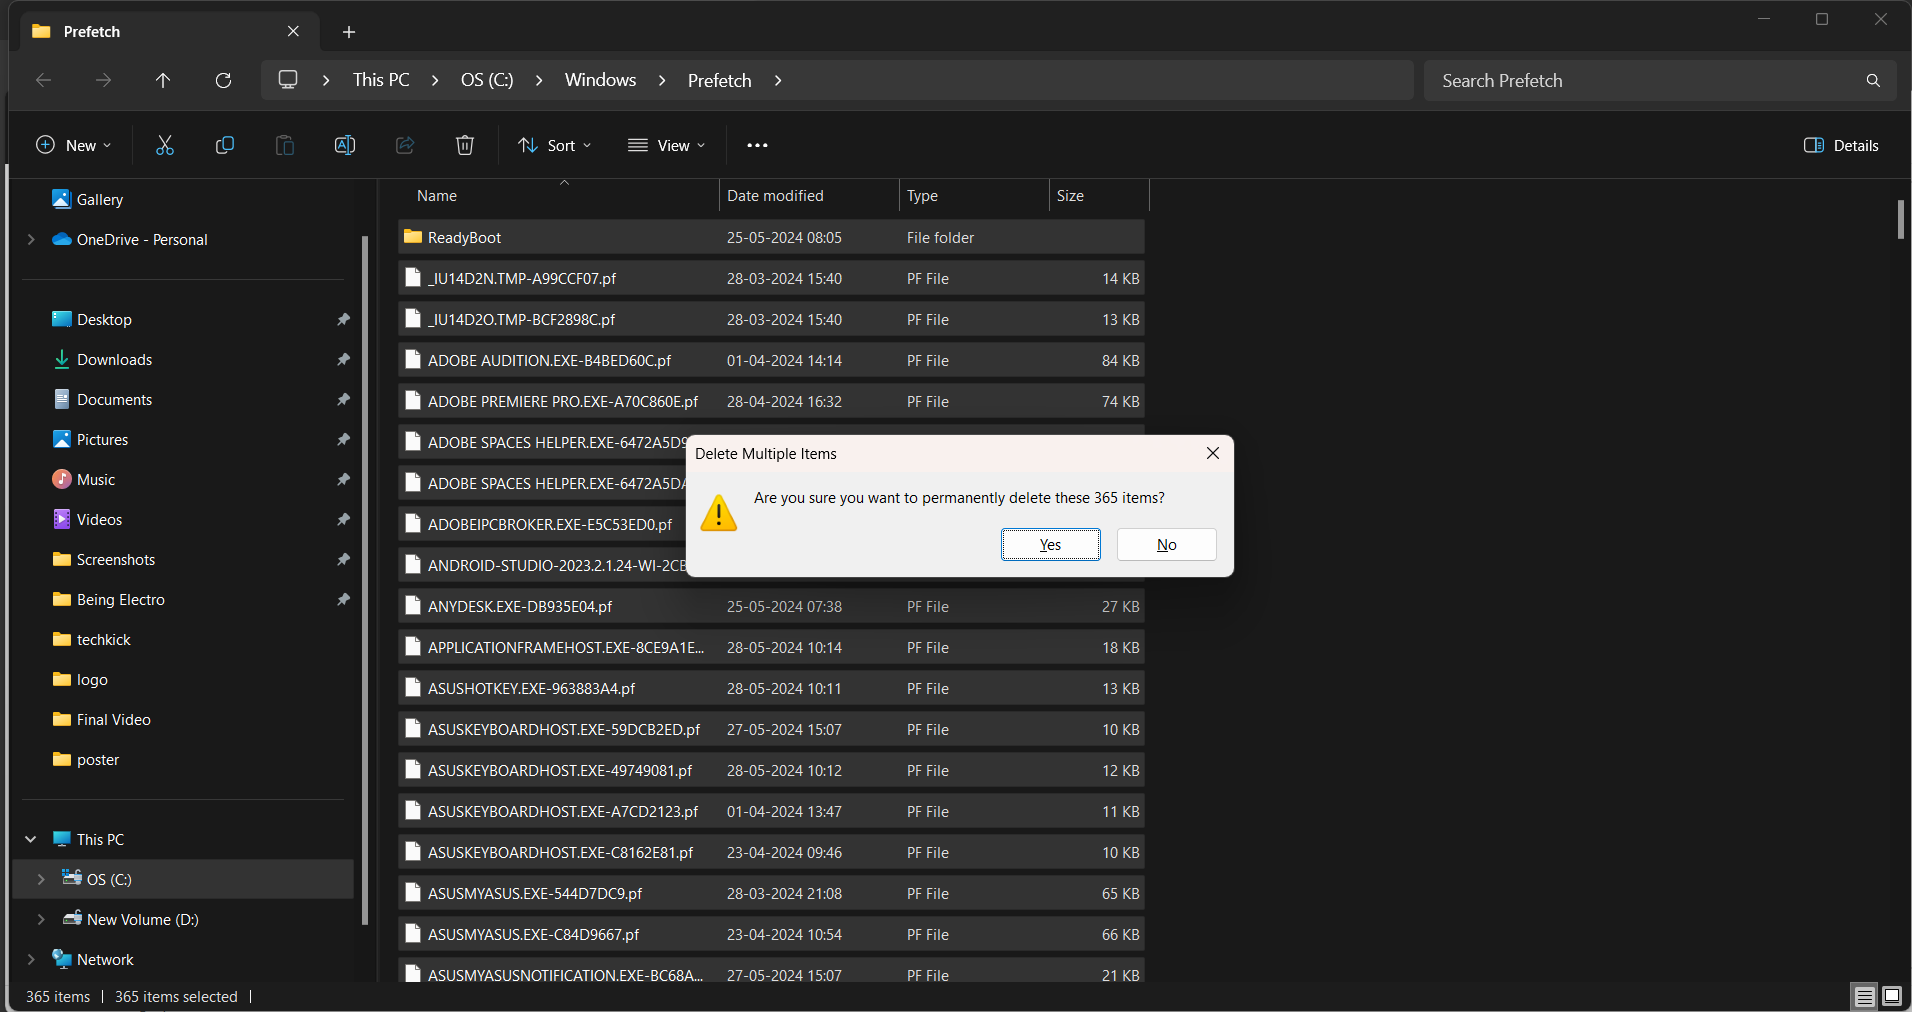
Delete prefetch files.
Prefetch files are a specific type of file used on Windows systems to speed up how quickly programs launch but it also covers some amount of space. But it is safe to delete.
- Open Run (search bar).
- Write prefetch And click on OK.
- Click On Continue
- And Delete all the files that can be deleted.
- ( Leave some files that are not deleted).
Then Delete the Temp Files.
Temp Files Also known as temporary files, temporary files are files created by programs and applications to temporarily store data while they are running.
How to Delete the Temp Files
- Open Run (search bar)
- Write %temp% and click on OK.
- Click On Continue
- And Delete all the files that can be deleted.
- ( Leave some files that are not deleted)
- Again open RUN.
- Write Temp and Click on OK.
- And delete all the files that can be deleted.
6. Reset Your Computer
And the last option is to reset your computer. But it is risky.
Resetting your computer on Windows can be a powerful tool to restore its performance and fix Fix Low Storage Problems on Windows.
It essentially reinstalls Windows while giving you the option to keep your personal files or erase everything. Here’s a breakdown of the reset process and the different options available:
Why Reset Your Computer?
There are several reasons why you might consider resetting your computer:
- Performance Issues: If your computer is running slow, experiencing crashes, or has become cluttered with unnecessary software, a reset can clear things up and give it a fresh start.
- Malware Removal: Resetting your computer can be an effective way to remove malware or unwanted programs that might be causing problems.
- Selling or Donating Your Computer: If you’re planning to sell or donate your computer, resetting it erases all your data and settings, ensuring your privacy and a clean slate for the new user.
Reset Options in Windows:
Windows offers two main reset options:
- Keep My Files: This option reinstalls Windows while preserving your personal files, documents, pictures, music, and videos. However, it removes your installed programs and settings.
- Remove Everything: This option performs a complete reset, wiping your entire drive clean. It reinstalls Windows and removes all your personal files, programs, and settings.
How to Reset Your Computer:
Here’s how to access the reset function and choose the appropriate option:
- Open Settings: Click on the Start menu and select “Settings” (gear icon).
- Go to Update & Security: In the Settings window, on the left-hand pane, click on “Update & Security.”
- Select Recovery: From the various options under Update & Security, click on “Recovery.”
- Choose Reset this PC: Under the “Reset this PC” section, click the “Get started” button.
- Select an Option: Here, you’ll see the two reset options: “Keep my files” and “Remove everything.” Choose the option that best suits your needs.
- Confirm and Reset: Follow the on-screen prompts to confirm your selection and initiate the reset process. The time it takes to reset your computer will vary depending on the chosen option and the speed of your system.
Important Considerations Before Resetting:
- Back-Up Your Data (Crucial): Especially if you choose the “Remove everything” option, it’s vital to back up all your important files, documents, pictures, and music to an external hard drive or cloud storage service before proceeding. Resetting with “Remove everything” will erase all your data.
- Time Commitment: Resetting your computer can take some time, depending on your system’s speed and the chosen option. Be prepared to wait for the process to complete.
- Reinstall Programs: After resetting with “Keep my files,” you’ll need to reinstall all your programs.
Alternatives to Resetting:
Before resorting to a full reset, consider some alternative solutions:
- Uninstall Unused Programs: Identify and remove programs you don’t use anymore. This can free up storage space and potentially improve performance.
- Run Disk Cleanup: The built-in Disk Cleanup tool helps you remove temporary files, internet files, and other non-essential items.
- Scan for Malware: Use antivirus or anti-malware software to scan your system for any malicious programs that might be causing problems.
Resetting your computer can be a helpful solution for fixing low Storage Problems on Windows, but it’s important to understand the different options and back up your data beforehand. Consider alternative solutions if possible to minimize disruption.
Conclusion
So overall, These methods help you to fix the Low Storage Problem on Windows.
So, If you like our content then share it with your friends.
Thanks for reading.
강남콜걸
Superb layout and design, but most of all, concise and helpful information. Great job, site admin. Take a look at my website QN7 for some cool facts about Car Purchase.
I’ve recently started a website, the information you provide on this website has helped me tremendously. Thank you for all of your time & work.